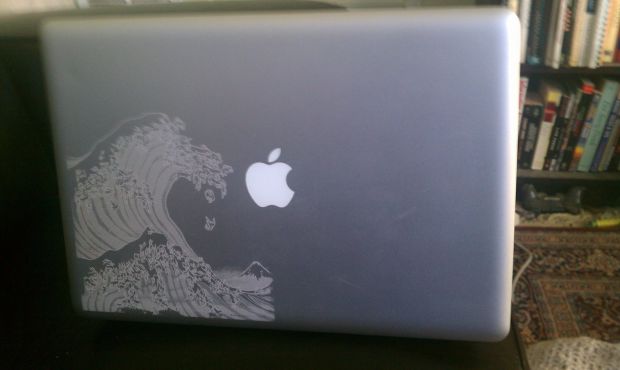
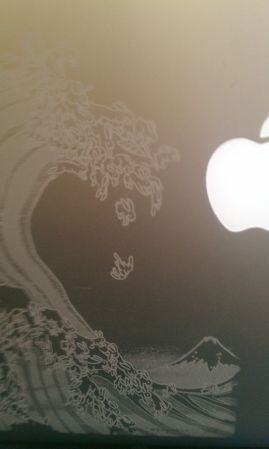
… because how awesome is my laptop now?
I have long loved Kozyndan’s ‘Uprisings.’ It’s a play on Hokusai’s ‘The Great Wave off Kanagawa,’ with bunnies. I got my anodized aluminum Macbook Pro, and saw someone had etched theirs in a laser cutter. I thought this was a great choice to put on mine. I bought the poster, had it scanned at a shop with a large-format scanner, pulled it into the Gimp open-source graphics package (comparable to Photoshop), and messed with it a fair amount. Then I brought it into PS1 and etched it on our laser cutter. I have to give credit to Will McShane for his assistance in showing me how to edit the image and operate the laser cutter. Both operations fall in that category of things I do rarely and are sort of complicated, so my memory doesn’t hang on to them well. It came out perfectly. Thanks so much for your help, Will.
I wanted to document the process a bit, though I neglected to take pictures.
getting and editing the image
I ordered the paper poster and had it scanned at the highest resolution I could find. At 16×22, that wasn’t that high–Fedex/Kinko’s got me a 100 DPI image. Which turned out ok.
Once I had it in my machine, I used the Gimp to make it more laser friendly. This took the most messing around and blind alleys, but Will got me going in the right direction. From there, it wasn’t quite as straightforward as what follows, but this is the bottom line.
- I opened the image in Gimp, and did Layer > Duplicate Layer;
- selecting the top layer, I used Filters > Edge Detect > Edge to pull out the bunnies visually, and Colors > Invert to get the image in black on white instead of the other way around;
- In Colors > Brightness/Contrast I turned up both–brightness to wash out the noise in the image, and contrast to keep the black outlines sharp;
- did Layers > Transparency > Add Alpha Channel, and in the layers dialog turned the opacity of the top layer down so the lower layer would show though;
- selected the lower layer and turned up the brightness and contrast on it too;
- feathered the edges… this was the part that did not come out perfectly. I selected the top layer again, did Select > All, Select > Shrink by 50 pixels, and Select > Rounded Rectangle;
- did Select > Invert, and then Select > Feather. Then I did Edit > Clear, and saw the top layer feathered. I selected the bottom layer and did Edit > Clear again.
- did Color > Desaturate in both layers to get it in grayscale;
- computed the right DPI so that the image would fit my laptop. The original was 100 DPI, and was 1669×2229 pixels. It had to fit a 9 inch vertical space, so I divided 2229 pixels by 9 inches, and got 248 DPI;
- went into Image > Scale Image, and changed the vertical DPI to 248, and Gimp computed the rest;
- exported the file to jpg, and put it on a thumb drive to put in the computer running the laser cutter.
I don’t think this is precisely the process anyone should follow to make an image laser-printer friendly. It worked with mine. Some of these steps and techniques might be useful. It might be good for you to just resize your raw image and see how it etches on a piece of cardboard or something first, just to get an idea of what it will do. Speaking of which…
To ze LAZZORZZZZ!!!!1!!1!!!
So I put the USB key in, brought up Corel Draw, and got to etching. I will not document the entire process of using the laser cutter. Different cutters, different software, different setups… if you want to learn PS1’s setup, come down to PS1 and get certified on the device. But this was basically how it went:
- I cleaned all the food/fingerprints/accumulated schmutz off my lappie;
- did a test etch on a piece of cardboard, and saw an artifact along the right edge of the image, which was easy to clean up;
- (this was Will’s moment of genius, I thought) taped another piece of cardboard to the top of my laptop, along one edge so it could flip over like a hinge. I made sure there was clearance inside the laser cutter so I could actually flip it without moving the laptop;
- positioned the laptop inside the laser cutter, as precisely as I could so the etch would fall in the right position;
- etched once with the cardboard in place. It looked perfect;
- flipped the cardboard over;
- took a deep breath;
- and etched my laptop.
And you see the results above. To be clear, I should give Will more credit–he did a few of the hands on steps there, and was helpful throughout.


Supercool, John. It looks great